

Alerts Configuration
Stay informed about important shifts with scheduled updates tied to your datasets and key metrics.
Alerts push autonomous insights directly to your inbox so you stay informed without logging into DataGenie — DataGenie's detection engine runs continuously, and Alerts is how those insights reach the right people on the right cadence.
How to set up an alert
Navigate to Configurations
Open DataGenie and click Configurations from the left sidebar. This is where all alert channels and system-level settings are managed.
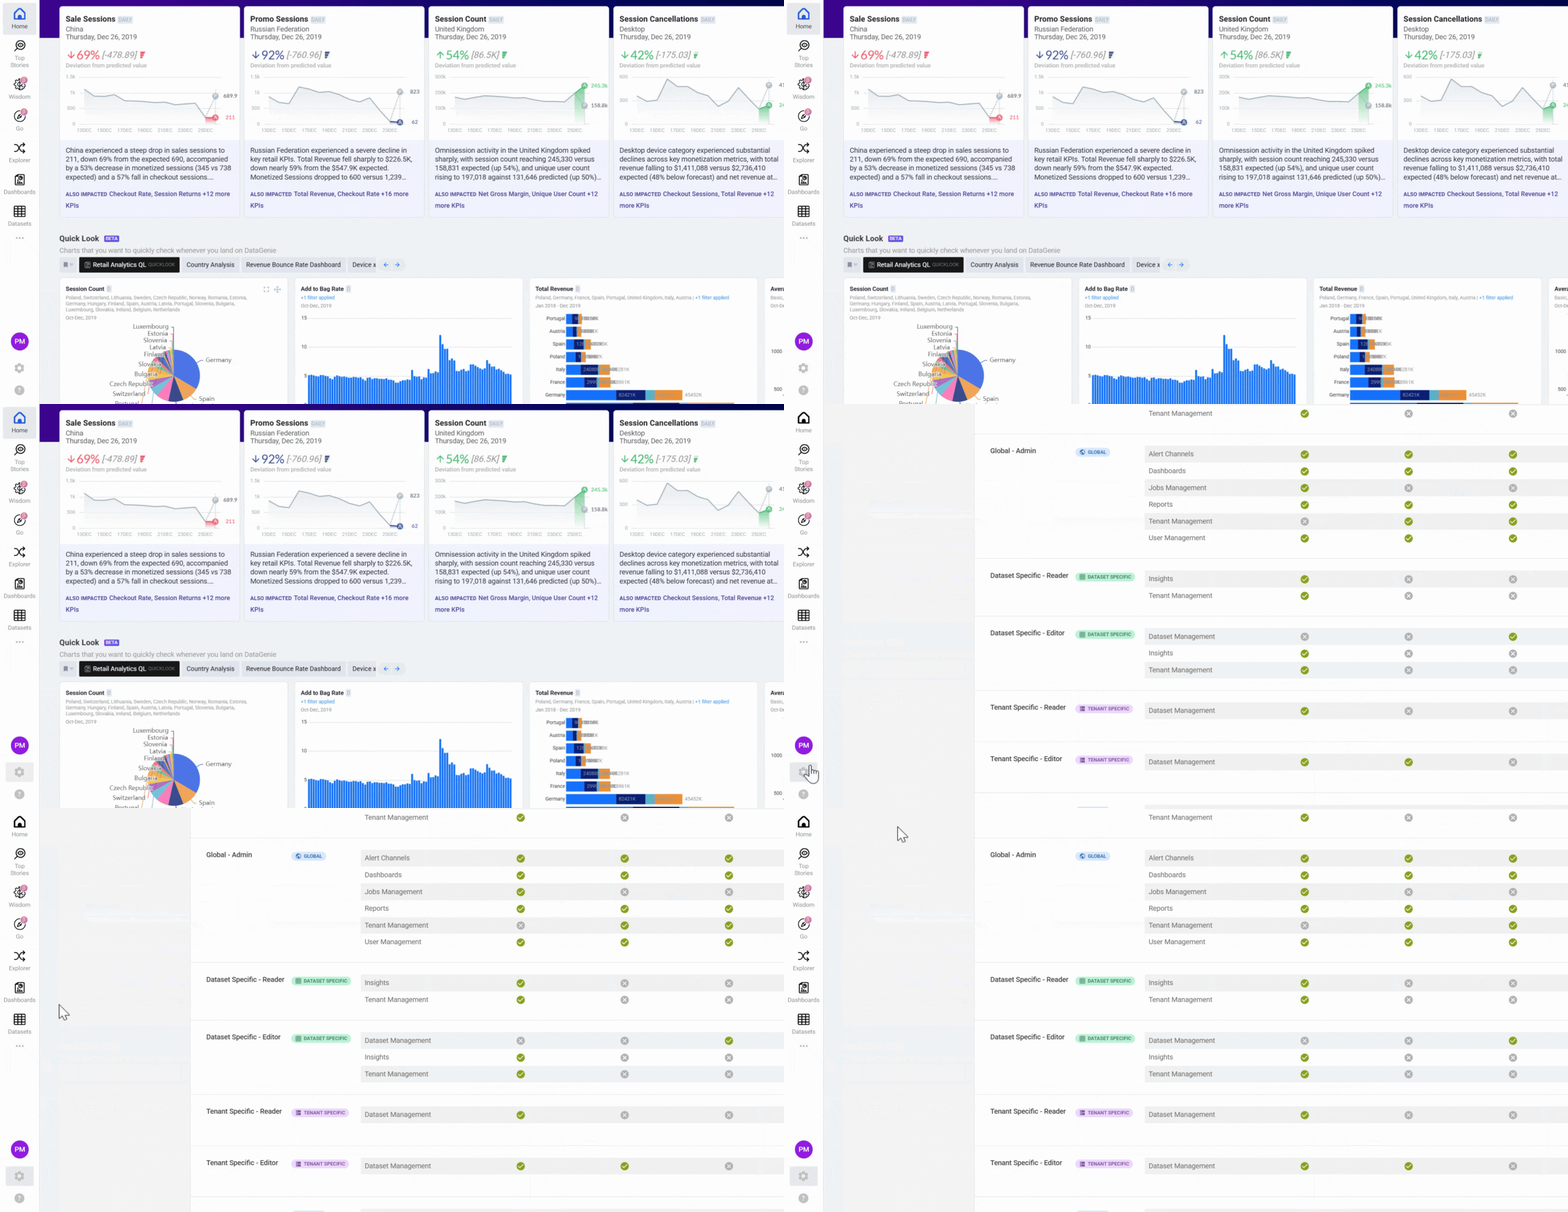
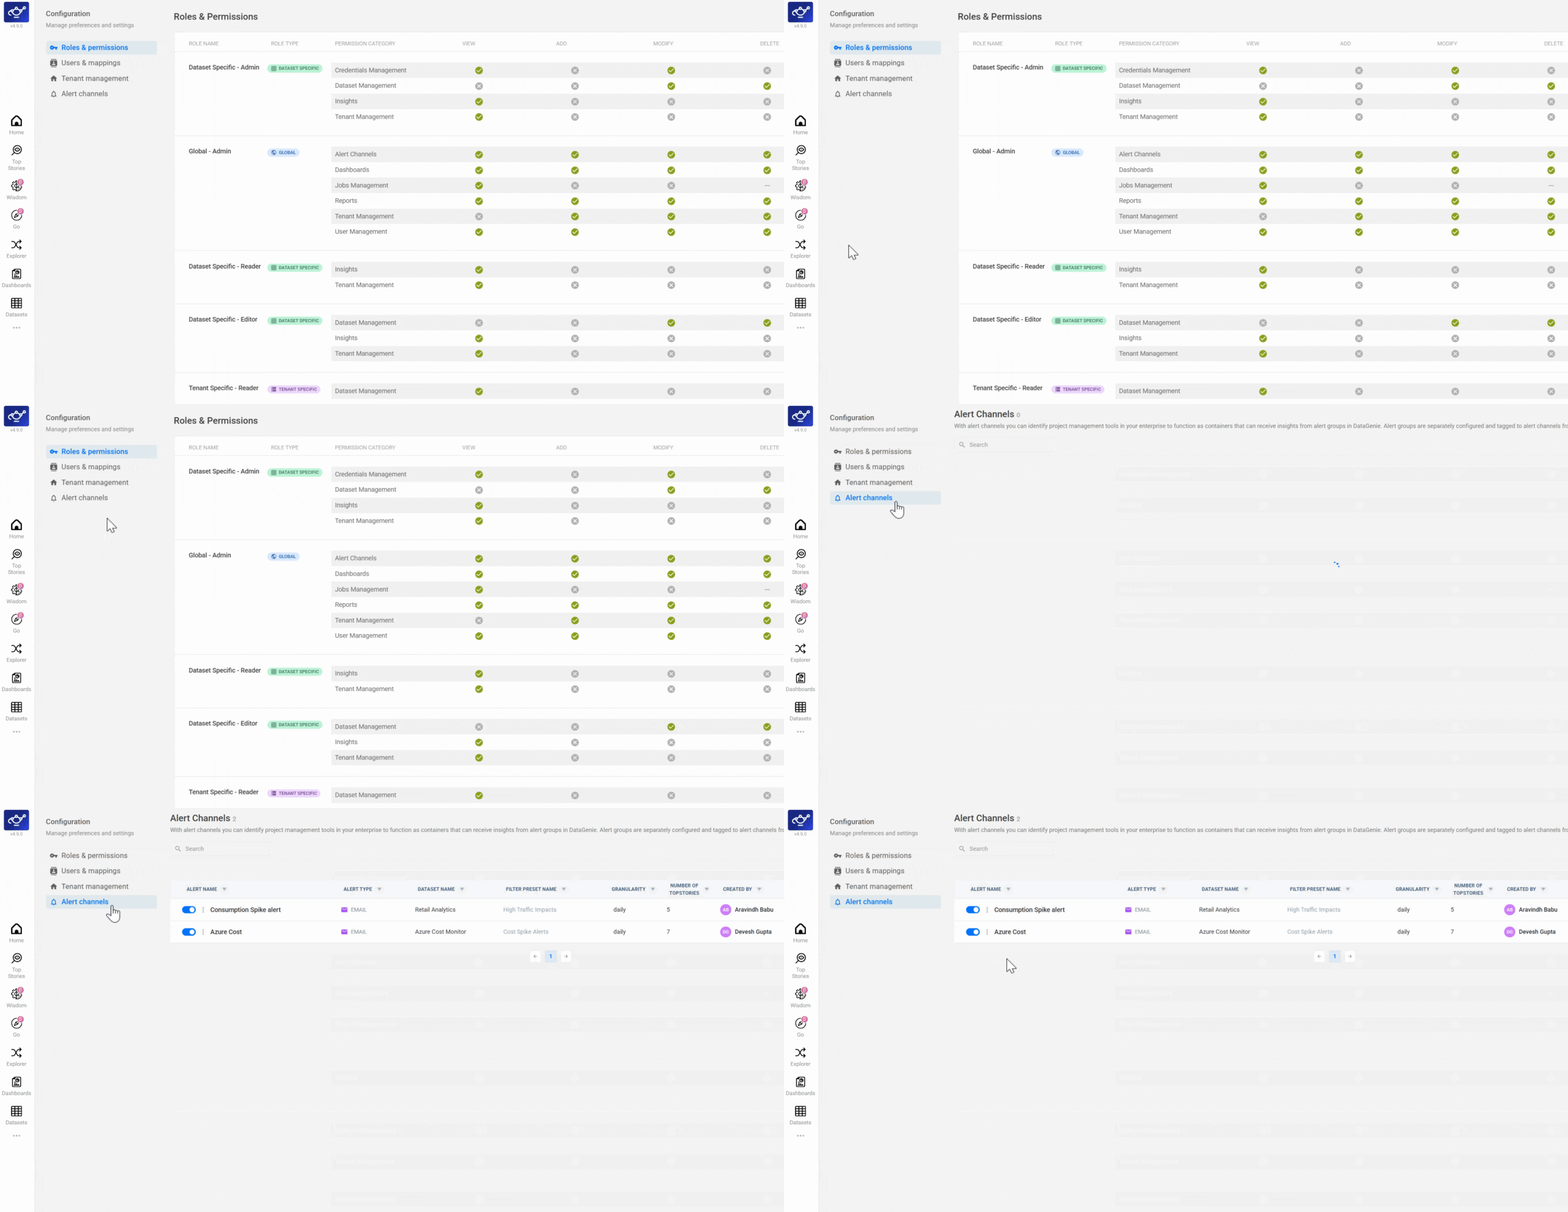
Open the Alerts channel
On the configurations screen, select Alerts Channel from the left panel. You'll see a list of any existing alerts and the option to create new ones.
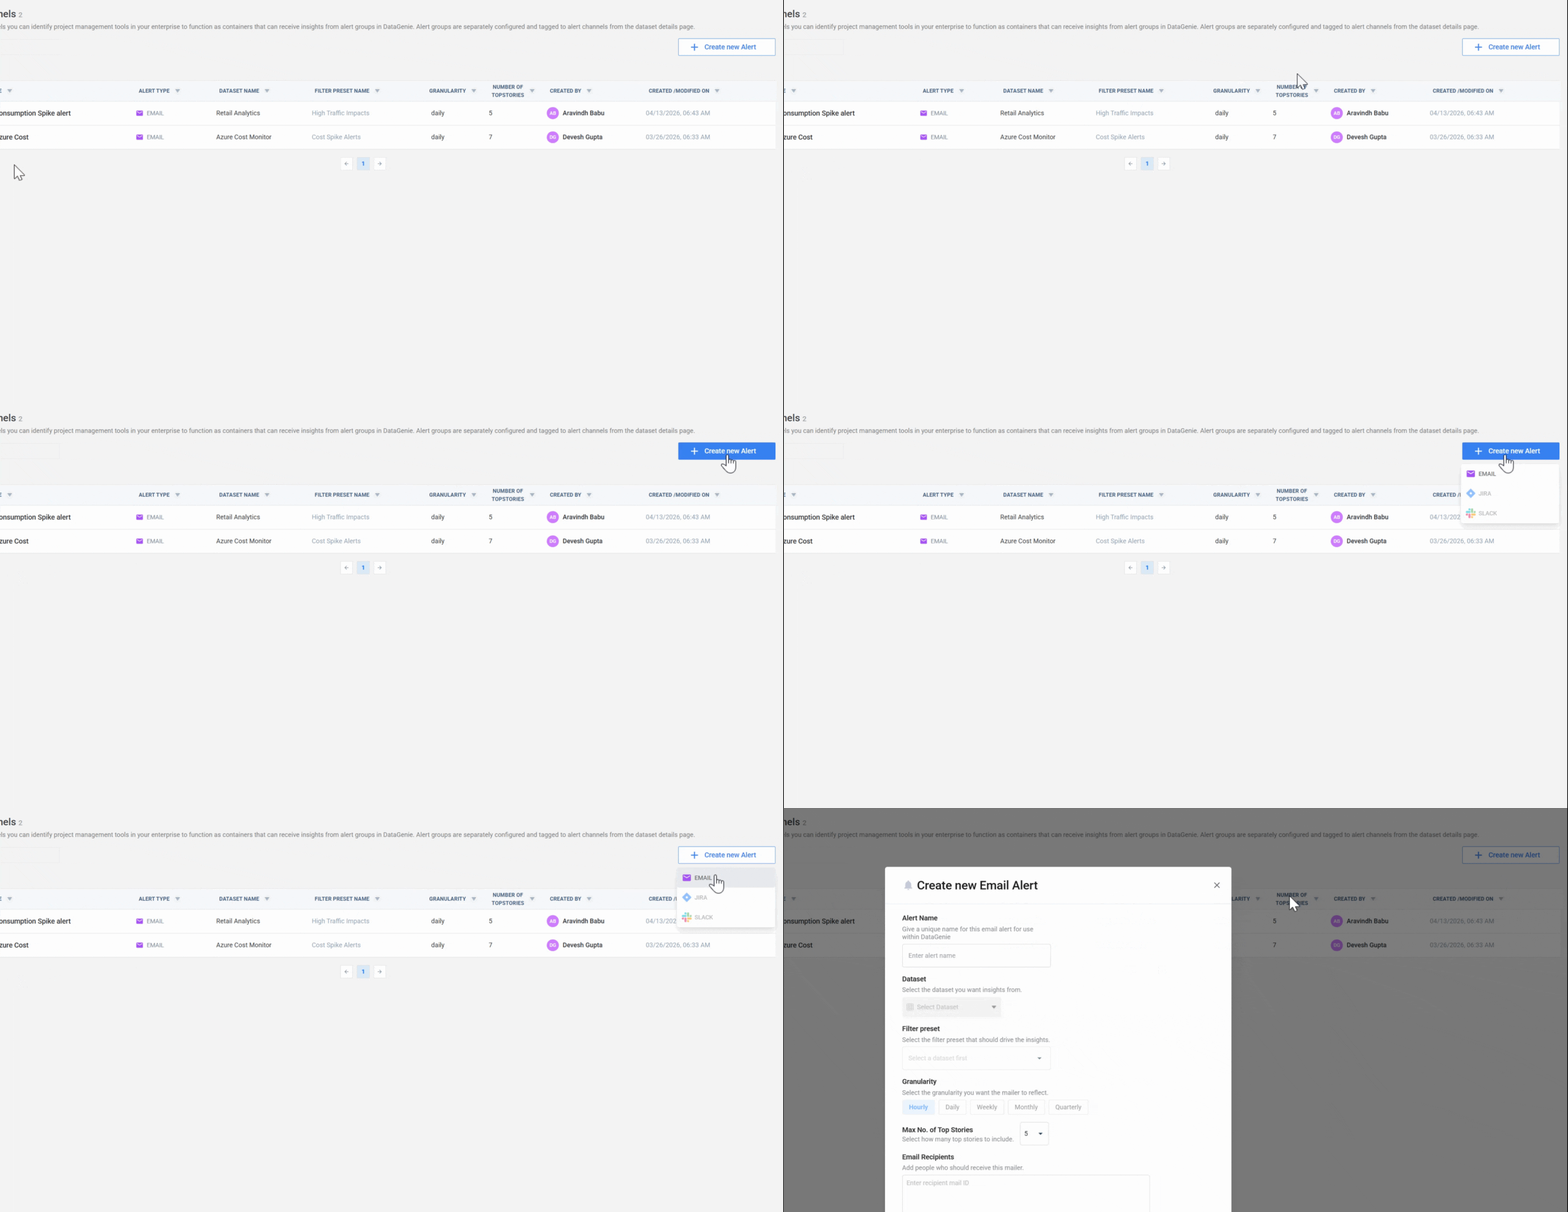
Click Create Alert
Click Create Alert to start the setup flow. A configuration panel opens where you'll define what gets sent, to whom, and how often.
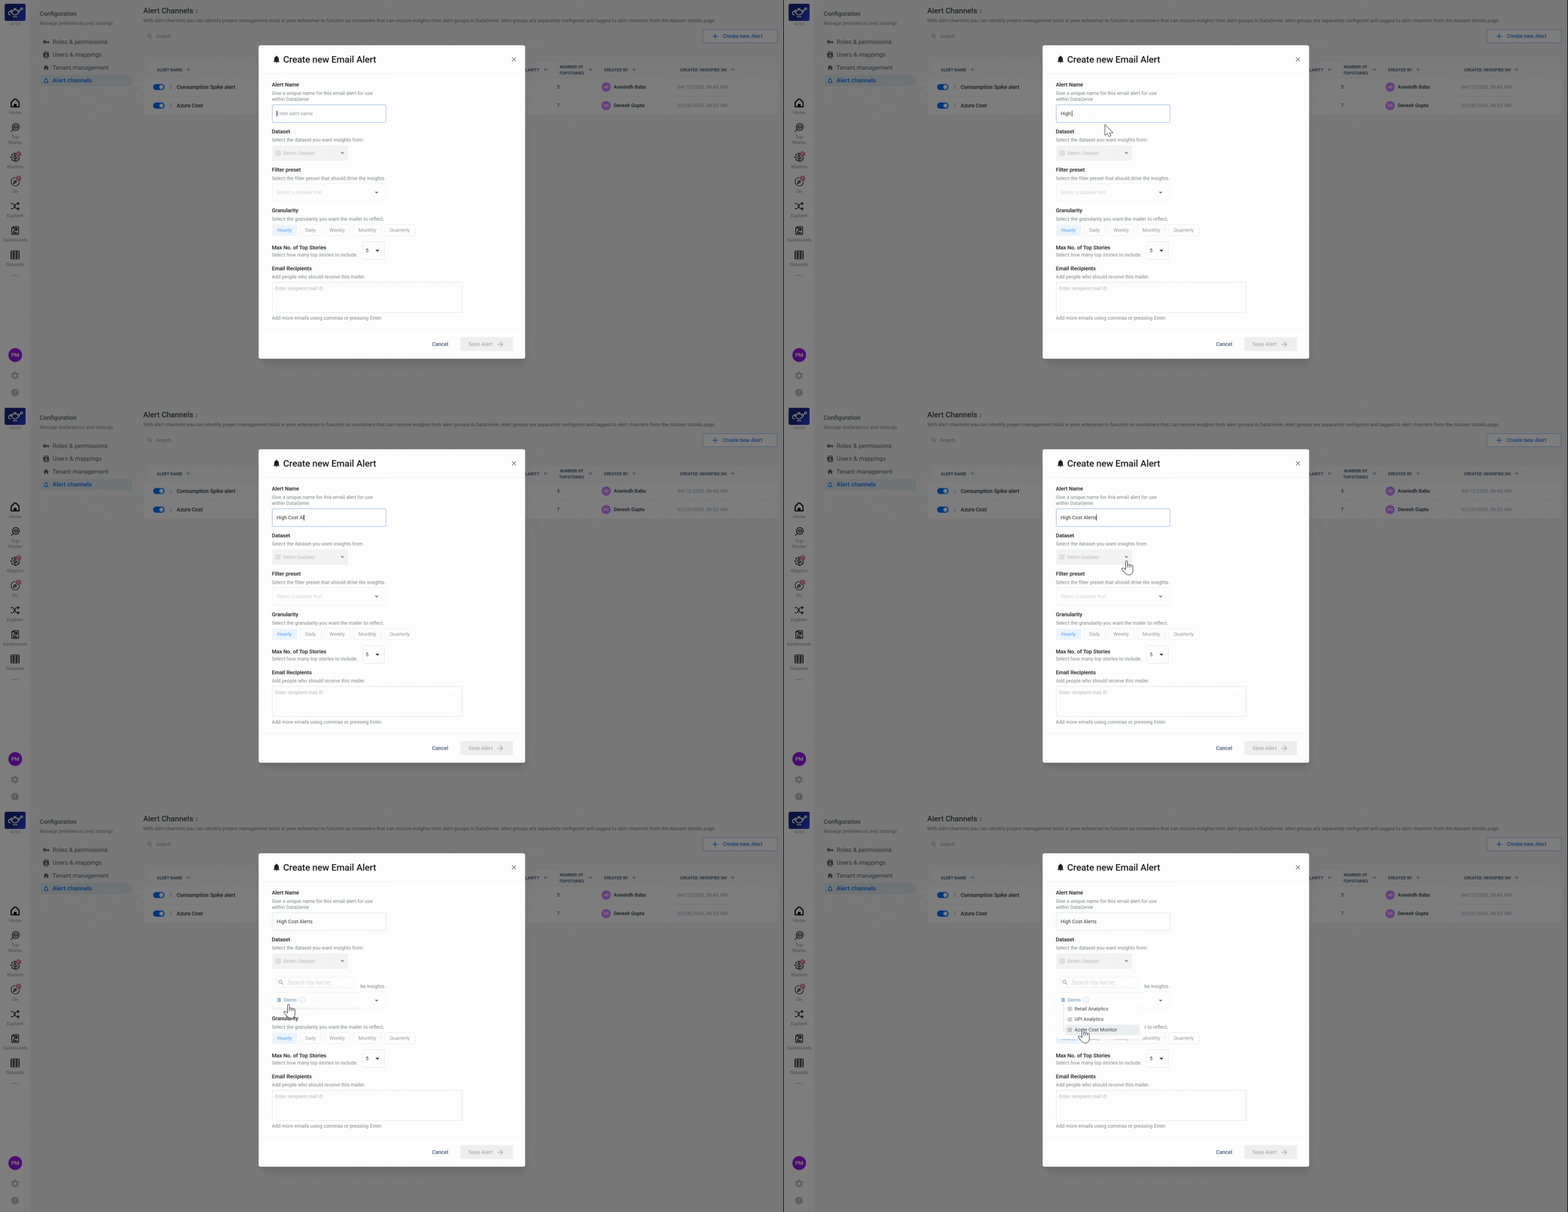
Configure the alert details
Select the dataset you want to monitor, then apply a filter preset to scope which Top Stories surface in the alert. Filter presets control the segment, KPI scope, and story type included — if you haven't created one yet, set it up before continuing.
Set the frequency and add recipients
Choose how often the alert runs — weekly, monthly, or quarterly — then add the email addresses of everyone who should receive it. Recipients don't need to be DataGenie users; the alert delivers the full story digest directly to their inbox.
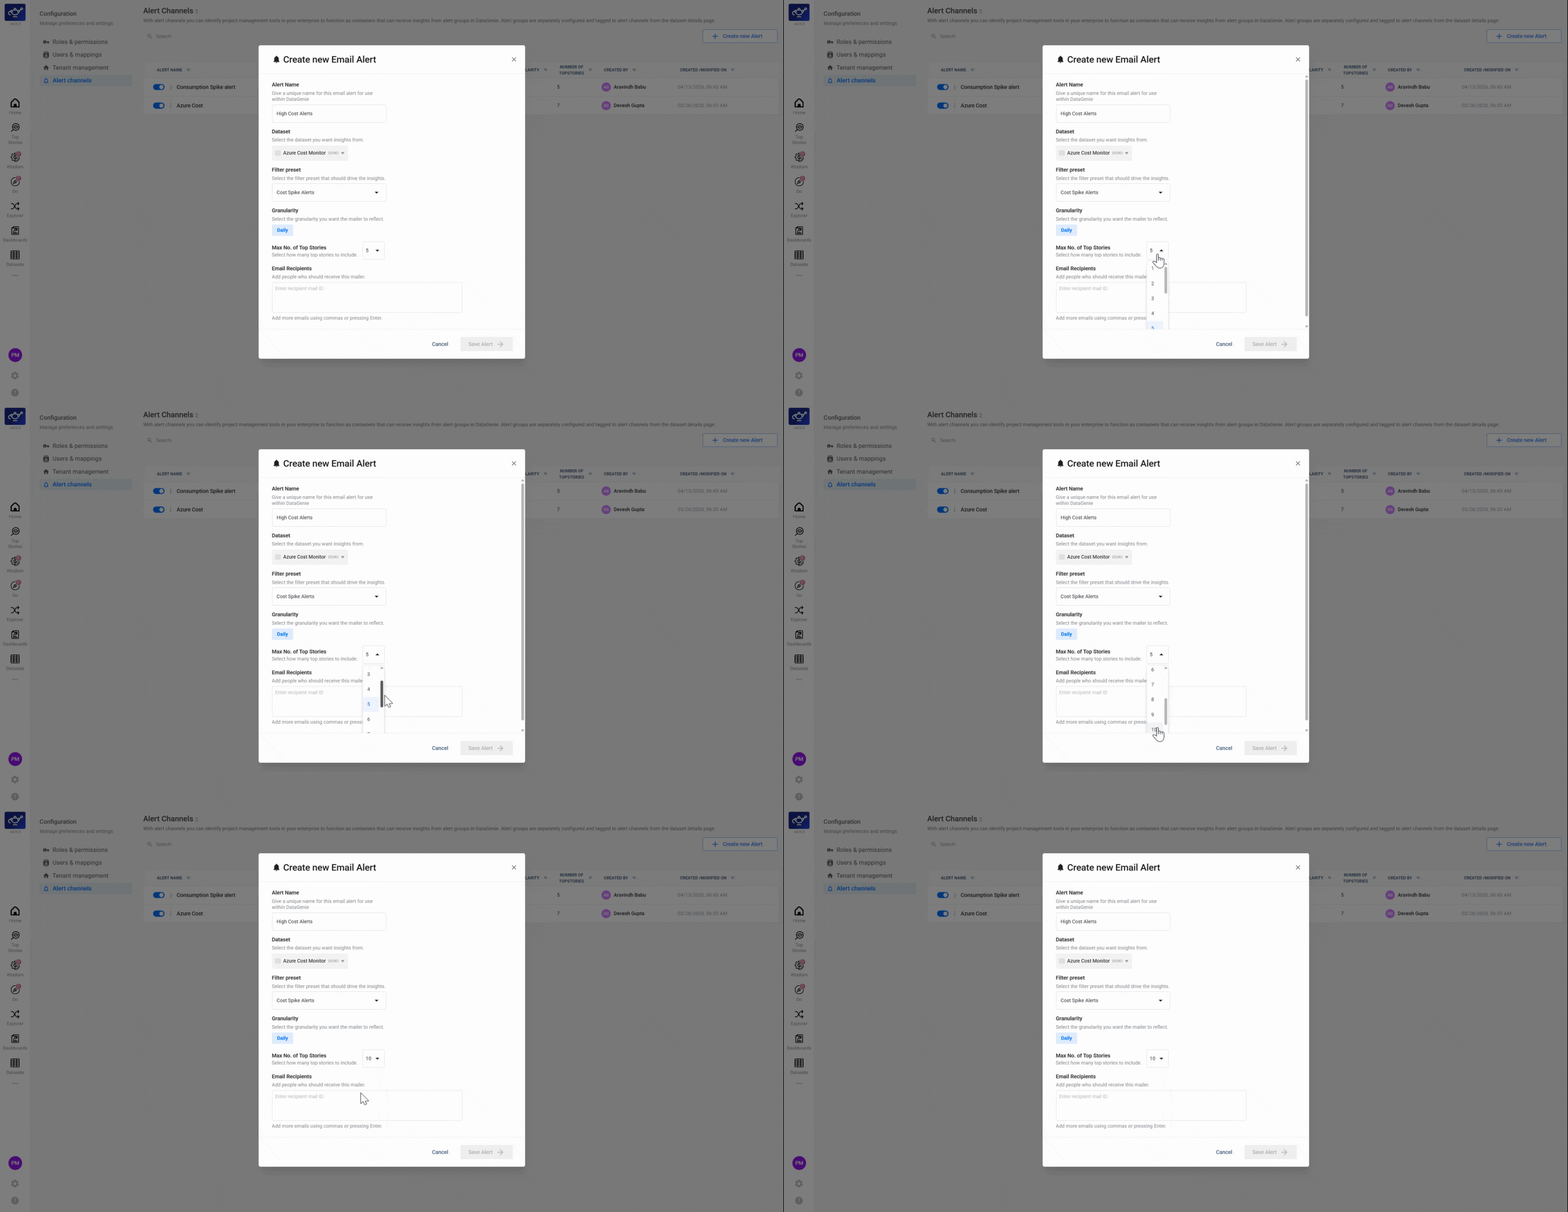
Review and save
Check your configuration — dataset, filter preset, cadence, and recipients — then click Save. The alert is now active and will run automatically on the schedule you set.
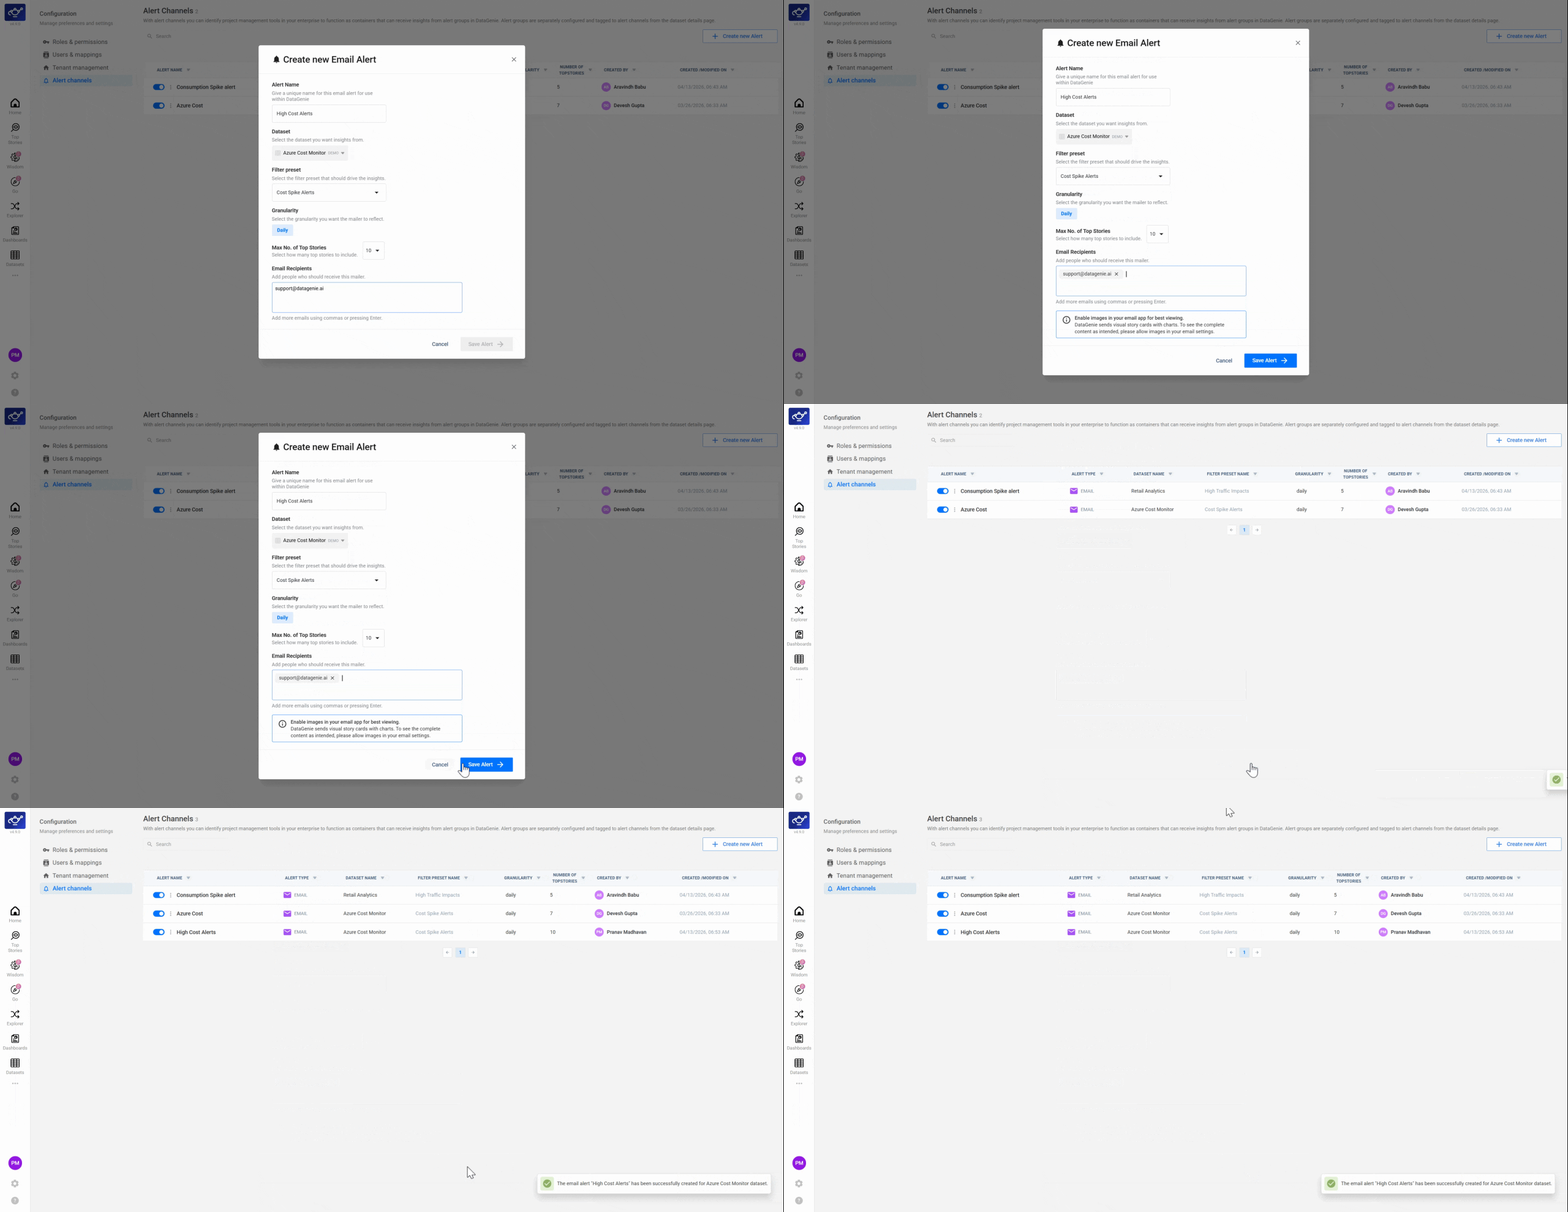
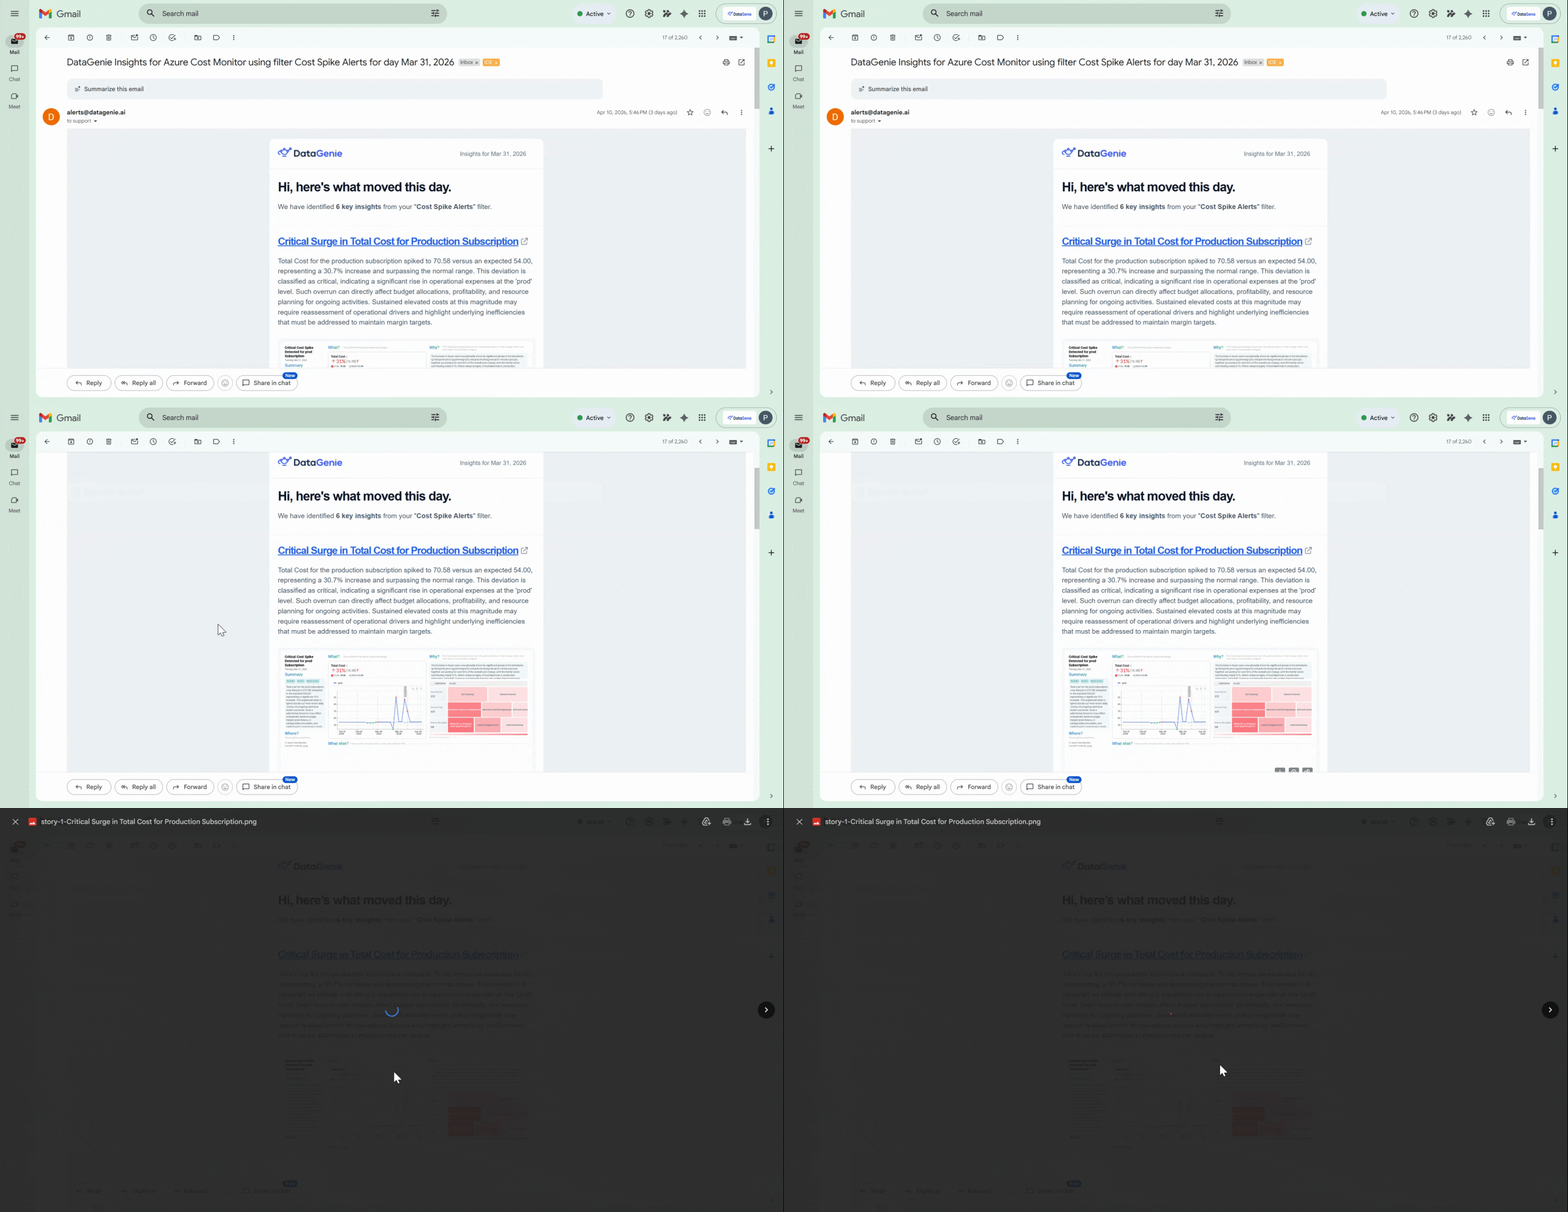
Receive the alert in your inbox
Recipients get an email with the full Top Story: narrative summary, key metric changes, and visuals. Each email includes a direct link back to DataGenie for anyone who wants to drill deeper into a story.
Keep alerts focused — start with one dataset and one filter preset. A well-scoped alert with 3–5 stories is far more actionable than a broad one that floods inboxes.