How to create a Filter Preset
Access the filter panel
Open the Top Stories section
Navigate to Top Stories from the left sidebar. This is where DataGenie surfaces all autonomous stories — KPI anomalies, trend changes, and segment shifts — generated from your dataset’s latest data run.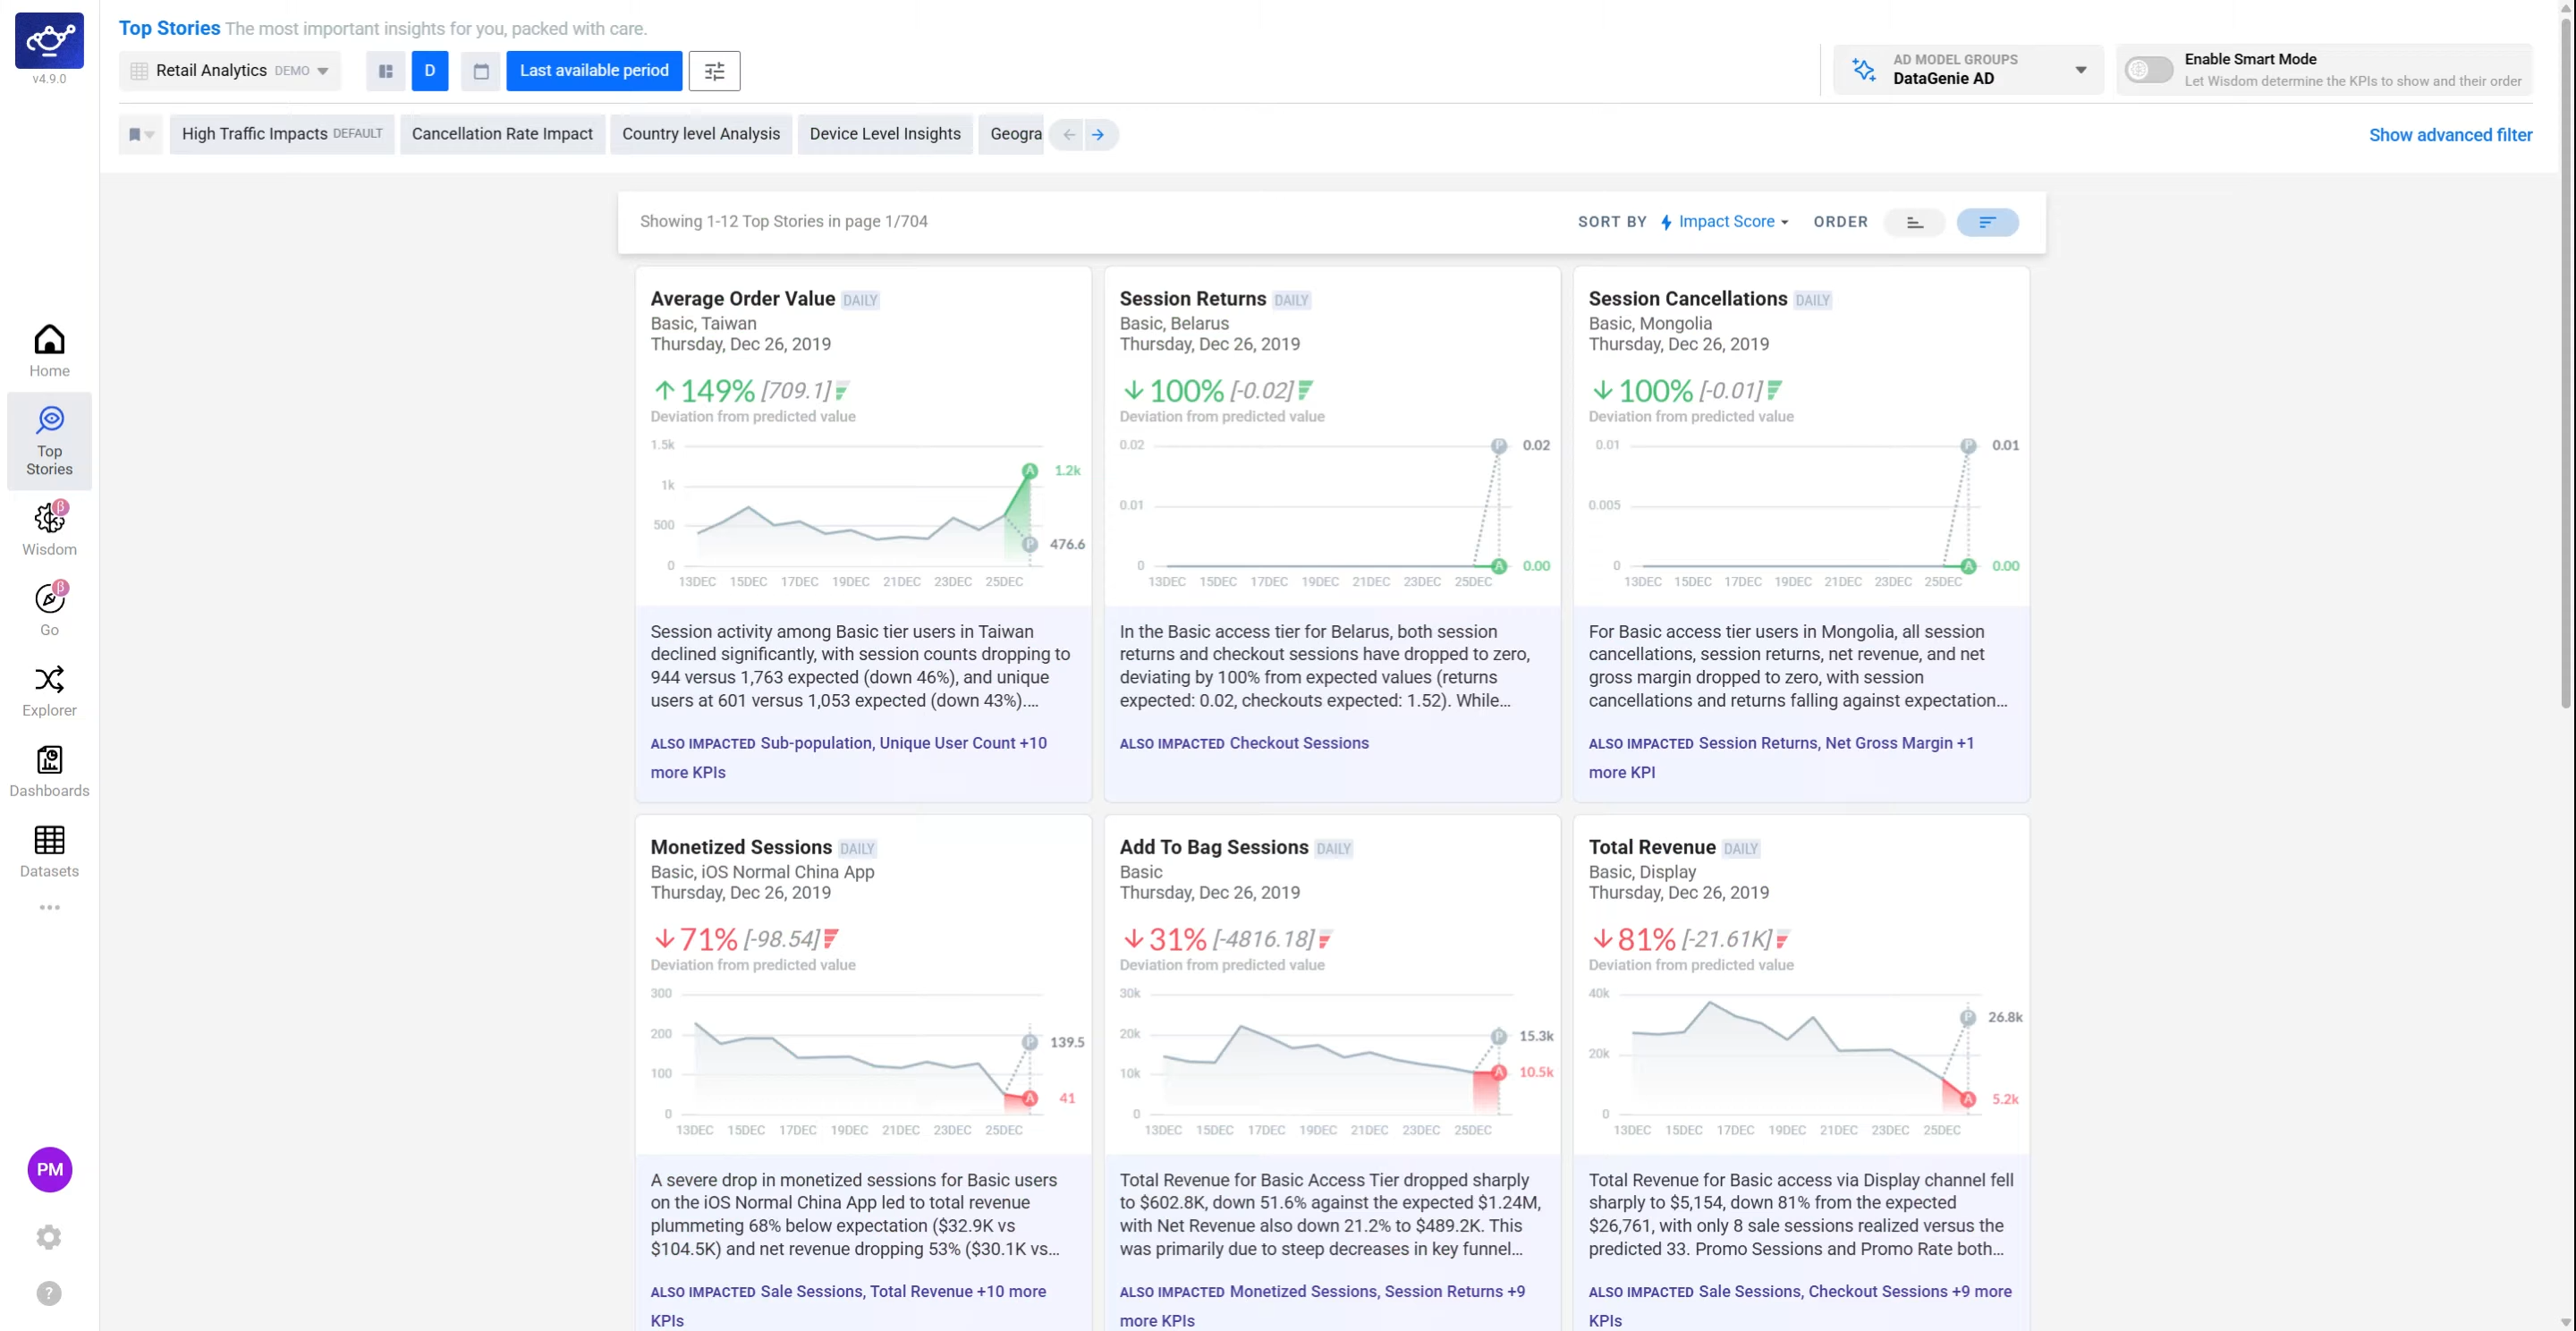
Browse or start a new Filter Preset
The filter preset area on the right shows any existing presets for your dataset. Browse them to see if a suitable one already exists, or click in the preset area to begin creating a new one.
KPI filters
Select a KPI filter
In the KPI tab, select the KPIs you want to include in story generation. Only stories involving these KPIs will be evaluated — this focuses DataGenie’s detection on the metrics your team cares about most and reduces noise from irrelevant KPIs.
Toggle the View filter to pin a KPI
Toggle the View filter on a KPI to pin it. Pinned KPIs are always included in the evaluation scope and their stories are promoted to the top of the feed — useful for KPIs you need to monitor every run, regardless of impact rank.
Set Min/Max value thresholds
Enter Min and Max values to restrict stories to a specific value range for the selected KPI. Use this to exclude stories below your materiality threshold (too small to act on) or above an expected ceiling (known outliers you don’t need to see repeatedly).
Set the Impact filter
Use the Impact filter to restrict stories by severity level — for example, showing only Critical Negative anomalies. This cuts noise from routine fluctuations and surfaces only the changes that require immediate attention.
Dimension filters
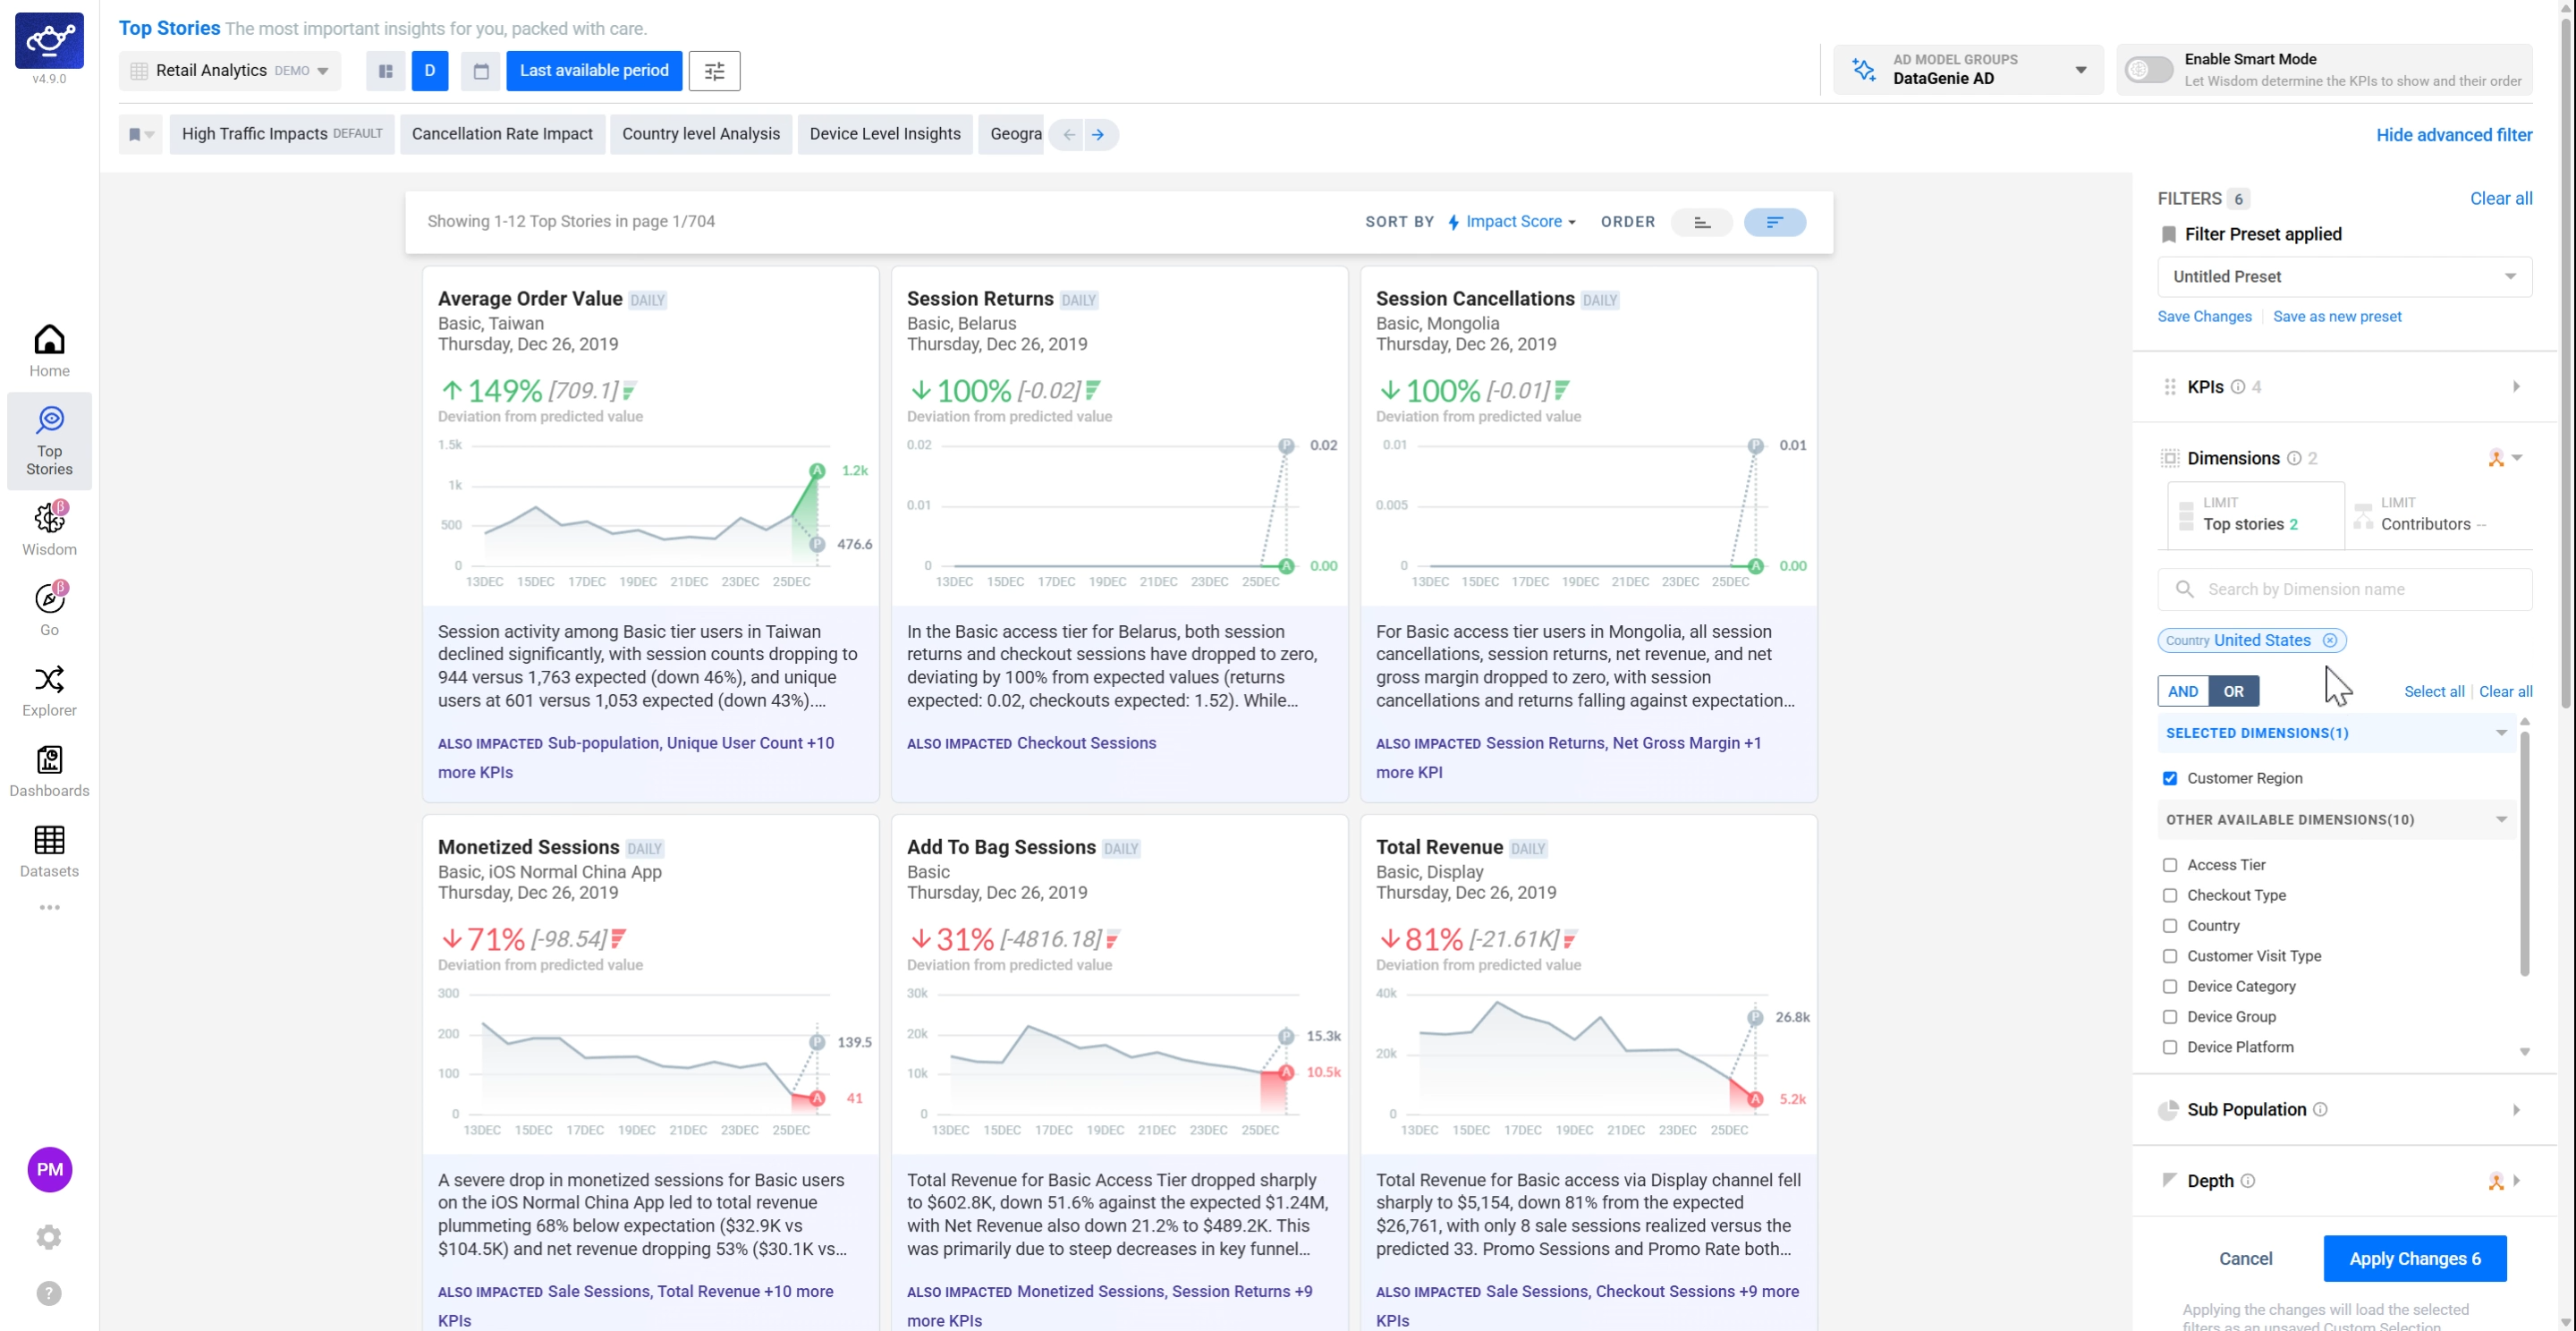
Switch to the Dimensions tab
Click the Dimensions tab to control where DataGenie looks for anomalies. Here you scope the analysis to specific dimension groups — such as Region, Channel, or Product Category — rather than scanning every dimension in the dataset.
Search for dimension values and set AND/OR logic
Use the search bar to find and select specific dimension values. Set AND logic to require all selected values to match, or OR logic to match any of them. This determines how multiple dimension conditions combine in the filter.
Restrict Contributors to specific dimension segments
Select or search for specific Contributors to limit which dimension segments appear inside stories. This keeps story breakdowns focused on the segments your team monitors, rather than surfacing every dimension value in the dataset.
Population and depth
Set the Sub-Population filter
Switch to the Sub-Population tab and define a minimum volume threshold. DataGenie will exclude segments below this size from story generation — preventing spurious anomalies driven by statistically insignificant sample sizes.
Set the Depth filter
Switch to the Depth tab and select the dimension intersection level. Depth 1 analyses each dimension independently; higher depths cross-reference combinations — for example, Region + Device Type together. Start at Depth 1 and increase only if you need granular multi-dimension insights.
Apply and review
Click Apply Changes
Once all filters are configured, click Apply Changes at the bottom of the panel. Top Stories regenerates based on your complete preset configuration — only the high-priority, high-relevance anomalies that match your defined scope now appear in the feed.
Review the prioritized story feed
Your refreshed feed now shows only the anomalies and changes that match your filter configuration. Scan the list to confirm the right stories are surfacing — if anything unexpected appears, return to the filter panel to adjust your preset.
Set up Story Alerts (optional)
To stay informed without checking back manually, configure alerts to send filtered stories to your downstream channels — Slack, email, or webhooks. This ensures your team is notified in real time whenever a high-priority anomaly matches your preset. See Alerts Configuration for the full setup.
What’s next
Top Stories
See how filter presets shape the autonomous story feed.
Alerts Configuration
Combine Filter Presets with Alerts to get notified only on the signals you care about.
KPI Attribution
Understand contributors, opposers, and side effects once your preset is applied.